The fastest way to make a small bathroom look cleaner is to tackle the stuff that lives above your eye line. In my first tiny apartment, the exhaust fan cover had aged into this sad nicotine-yellow color (no smokers, just time and humidity). I kept scrubbing my tile and switching out towels, but that dingy vent grille made the whole ceiling look older.
Good news: you can often fix a yellowed bathroom exhaust fan cover without rewiring anything. In many bathrooms, the “cover” (also called the grille) is a spring-clipped plastic piece that pops off for cleaning or replacement.
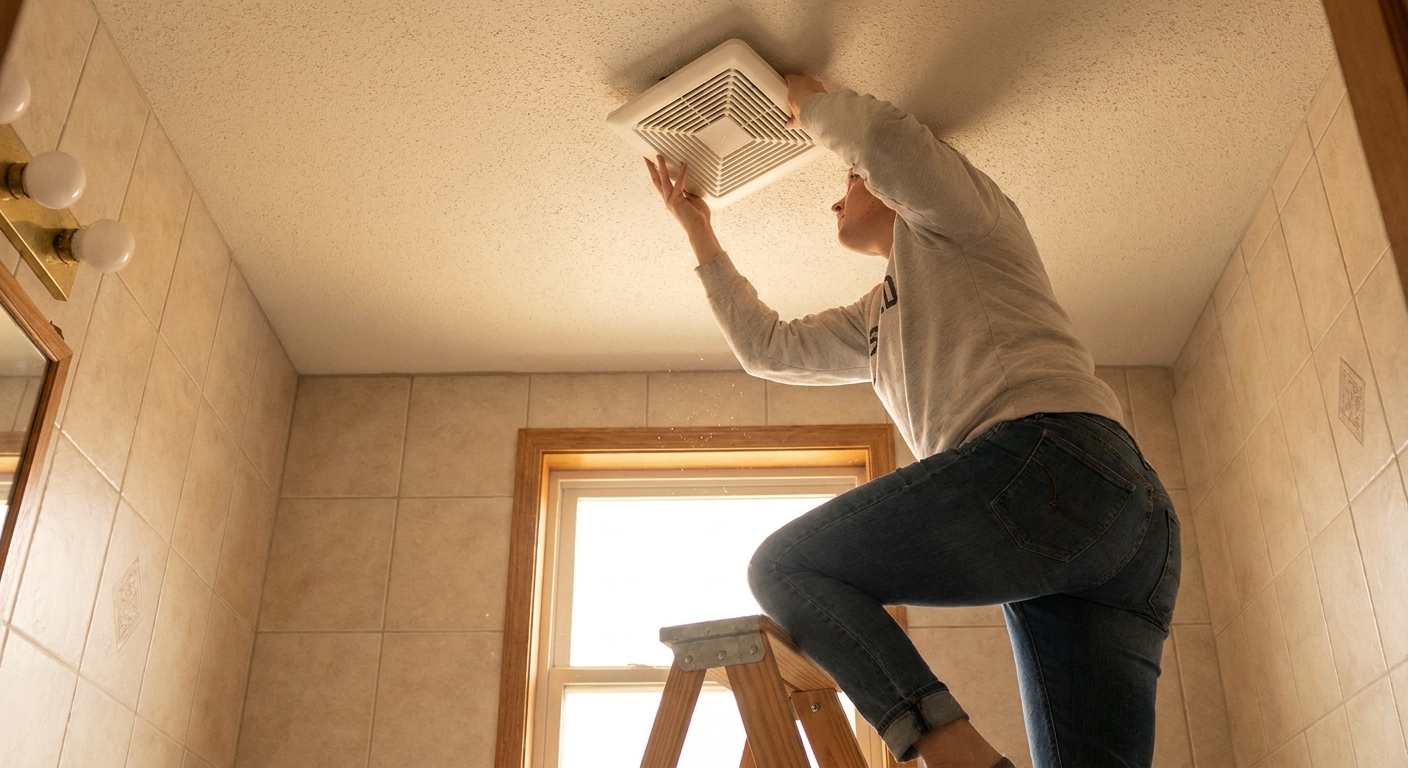
First, make it safe
You are not rewiring for this project, but you are working overhead near an electrical fixture. Do the quick safety steps anyway.
- Turn the fan switch off.
- Flip the bathroom breaker off if you will be reaching into the fan opening, cleaning the housing, or doing anything where the wiring and motor area could be exposed while you work. If you are only washing the plastic cover at the sink, the breaker step is not strictly necessary, but I still do it when I know I will be up on a stool more than once.
- Wait 5 to 10 minutes if the fan was running so the housing is not warm and dusty.
- Wear glasses (or at least do not look straight up) if yours is the kind of fan that drops a little dust confetti the second you touch it.
- Set up a towel in the sink or tub to catch drips and keep little clips from bouncing away.
Heads-up for rentals: If your fan is loudly rattling, barely pulling steam, or you see moisture spots spreading on the ceiling, cleaning the cover helps, but the fan may also need a deeper clean. For renter-friendly upgrades you can do without tools, I keep a running list here: Renter-Friendly Upgrades.
Before you start
- Grab a step stool that feels stable and gives you a comfortable reach.
- Take a quick photo of how the spring clips sit before you unhook anything. When you are reinstalling, this saves a lot of ceiling-side frustration.
How to remove the cover
Many standard bathroom exhaust fan covers come off the same way, but not all of them.
Quick check: If you see visible screws, a center knob, or a light lens that looks like it twists, your cover may be screw-fastened or twist-lock. Follow that removal style instead of forcing the spring-clip method.
- Place one hand on each side of the grille and pull straight down gently. It should drop about 1 to 2 inches.
- Find the spring clips (there are usually two wire springs).
- Pinch the clips toward the center to release them from the slots.
- Lower the cover and bring it to the sink for cleaning.
If it feels stuck, do not yank. Some covers are lightly painted to the ceiling. Run a plastic putty knife or an old gift card around the edge to break the paint seal, then try again.
If the springs keep snapping back: Angle the cover down and unhook one spring at a time. If your fingers cannot get a grip, needle-nose pliers can help (optional, not required).
Option 1: Deep clean it
Yellowing can be a mix of aged plastic, dust, hairspray residue, and bathroom humidity. Even if you plan to paint, cleaning helps the finish stick.
What you need
- Dish soap
- Baking soda (optional but helpful)
- Old toothbrush or small scrub brush
- Microfiber cloth
Steps
- Soak the cover in warm, soapy water for 15 to 20 minutes.
- Scrub the slats and edges with a toothbrush. Dust likes to glue itself right at the seams.
- For stubborn grime, make a paste of baking soda and dish soap and gently work it in.
- Rinse well and let it dry completely.
Important: Dry it all the way, especially in the corners. Trapped water can lead to drips in the fan housing and can also ruin paint adhesion.
Option 2: When it is truly yellowed
If your cover is clean but still looks yellow, you are dealing with plastic aging. At that point, the most reliable “fresh white” fixes are paint or replacement.
- About the sunlight trick: Some people find a short stint in bright, indirect light helps a little. Results vary, and it will not reliably reverse deep plastic yellowing. Too much sun can also warp or make thin plastic more brittle, so I treat this as a maybe, not a plan.
- Know when to stop: If the plastic has yellowed through, cleaning will not turn it back to bright white. That is when I move on to paint or swap.
Option 3: Paint the cover
This is my favorite budget fix when the plastic is permanently yellowed but the cover is intact. Paint gives you the clean ceiling look again without touching wiring.
Choose the right paint
- Best choice: A spray paint formulated for plastic, in satin or semi-gloss white. Satin is forgiving and looks closest to most ceiling plastics.
- Avoid: Heavy, rubbery coatings that can fill the vents. You want the slats to stay crisp and open.
Prep matters more than brand
- Clean thoroughly (see deep clean above) and let it dry.
- Lightly scuff glossy plastic with fine sandpaper (around 220 grit). You are not sanding it down, just dulling the shine.
- Wipe off dust with a damp cloth, then dry again.
How to spray it so it does not look painted
- Paint outside or in a well-ventilated area. Place the cover on cardboard.
- Use light coats from about 8 to 12 inches away. Start spraying off the piece, sweep across, then stop spraying off the piece.
- Do 2 to 4 thin coats instead of one thick coat. Thick paint is what clogs the slats and drips.
- Let it cure fully before reinstalling. Dry-to-touch is not the same as cured. If you reinstall too soon, the springs can dent the finish.
Renter note: Painting a removable cover is usually a low-drama upgrade because you can always swap it back later. If your landlord is picky about “alterations,” keep the original screws or any unique parts together in a labeled bag.
Option 4: Swap the cover
If the grille is cracked, warped, or permanently stained, replacing it is typically faster than fussing with paint. You still do not need to rewire. You are only replacing the cover.
Depending on your fan brand and whether it is a fan-light combo, replacements are sometimes under $20, but it is common to see $15 to $30.
How to buy the right replacement
- Measure the opening of the fan housing in the ceiling (not the grille). A quick tape measure check saves a return trip.
- Check the clip style on your current cover. Many are universal spring-clip styles, but not all.
- Take a photo of the fan housing label if you can see it. Some units have model numbers inside the housing lip.
Tip from too many tiny-bathroom trial runs: If your ceiling is slightly off-white, a bright optic-white cover can stand out. A soft white satin finish tends to blend better with older paint.
While it is down, clean the housing
This is optional, but if you have the cover off anyway, it is worth doing a basic dust removal so your freshly cleaned cover stays clean.
- Keep power off.
- Vacuum dust from the visible edges and around the intake using a brush attachment.
- Wipe the rim with a barely damp microfiber cloth. Do not push moisture up into the motor.
Skip this: Never spray cleaner up into the housing. Mist and foam can drift where you do not want them.
If your bathroom gets steamy fast, improving airflow can make the whole room feel fresher. I also like swapping dated fixtures that sit in the upper visual zone, like mirrors and lighting, without touching wiring. If that is your vibe, start here: Upgrade a Builder-Grade Mirror Without Removing It.
Reinstalling the cover
- Hook the spring clips back into their slots on the fan housing.
- Compress the springs and push the cover up until it sits flush.
- Turn the breaker back on, then test the fan.
If the cover will not sit flat, one spring is probably twisted or not fully seated. Pull it down and try again. It is finicky, not hard.
Common questions
Why did my fan cover turn yellow?
Time, heat, and humidity age plastic. Dust and aerosol products can also stain the surface. Even in a totally clean bathroom, older plastic can shift color.
Can I use bleach to whiten it?
I skip bleach for this. It can weaken some plastics and it does not reliably reverse true yellowing. A gentle soak and scrub removes grime. After that, paint or replacement is the realistic fix.
Will painting block airflow?
Not if you use thin coats. Heavy paint is the problem, especially on tight slats. Keep coats light and do not spray so close that you flood the openings.
What if my cover has a light in it?
Many fan-light combos still have a removable grille. Turn power off, remove the grille, and if the light lens comes off separately, wash that too. You are still not rewiring. If you see brittle wiring, scorch marks, or melted plastic, stop and contact maintenance or a licensed electrician.
The tiny-bathroom payoff
A bright, clean fan cover makes your whole ceiling look fresher, which makes the entire bathroom feel bigger. It is one of those five-dollar fixes that reads like you repainted the room.
If you are on a roll and want more small-space, budget-friendly refreshes, browse the rest of my quick wins in Budget Makeovers, or tackle another always-visible eyesore next, like old hardware: 5 Reversible Ways to Upgrade Cheap Bathroom Cabinet Hardware.